What do You Know About the Lab Arc Melt Furnace?
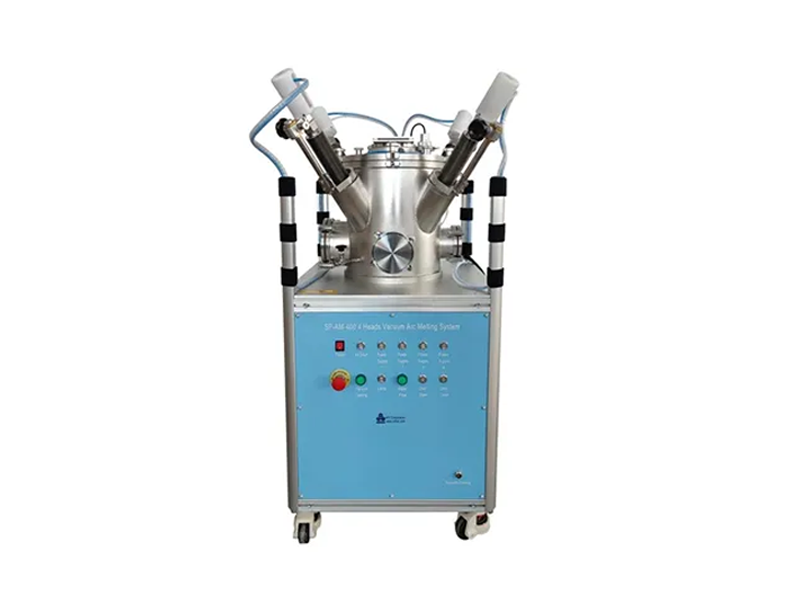
2025-08-06 13:24The SP-AM-400 4-head vacuum Lab Arc Melt Furnace is designed for temperatures of 25°C ± 15°C and humidity of 55% RH ± 10% RH. It requires a self-circulating cooling system with pure or deionized water, an AC 380V power supply, and an argon gas supply. Key specifications include an ultimate vacuum of 8 × 10⁻⁴ Pa, power consumption less than 60 kW, an operating pressure of -0.5 MPa, and a system vacuum leak rate of 5.0 × 10⁻⁷ Pa.l/s. The Lab Arc Melt Furnace features multiple safety features, including a molecular pump unit, a rotary melting crucible, and an argon arc welder. The Lab Arc Melt Furnace is tailored to specific process requirements.
Laboratory arc melting furnaces are suitable for vacuum melting of refractory metals such as tungsten, molybdenum, zirconium, tantalum, niobium, titanium, rhenium, beryllium, and their alloys. Made of high-quality materials, our 4-head vacuum Lab Arc Melt Furnace delivers fast melting speeds and high precision.

How to use the Lab Arc Melt Furnace:
(1) Turn on the chiller (not included).
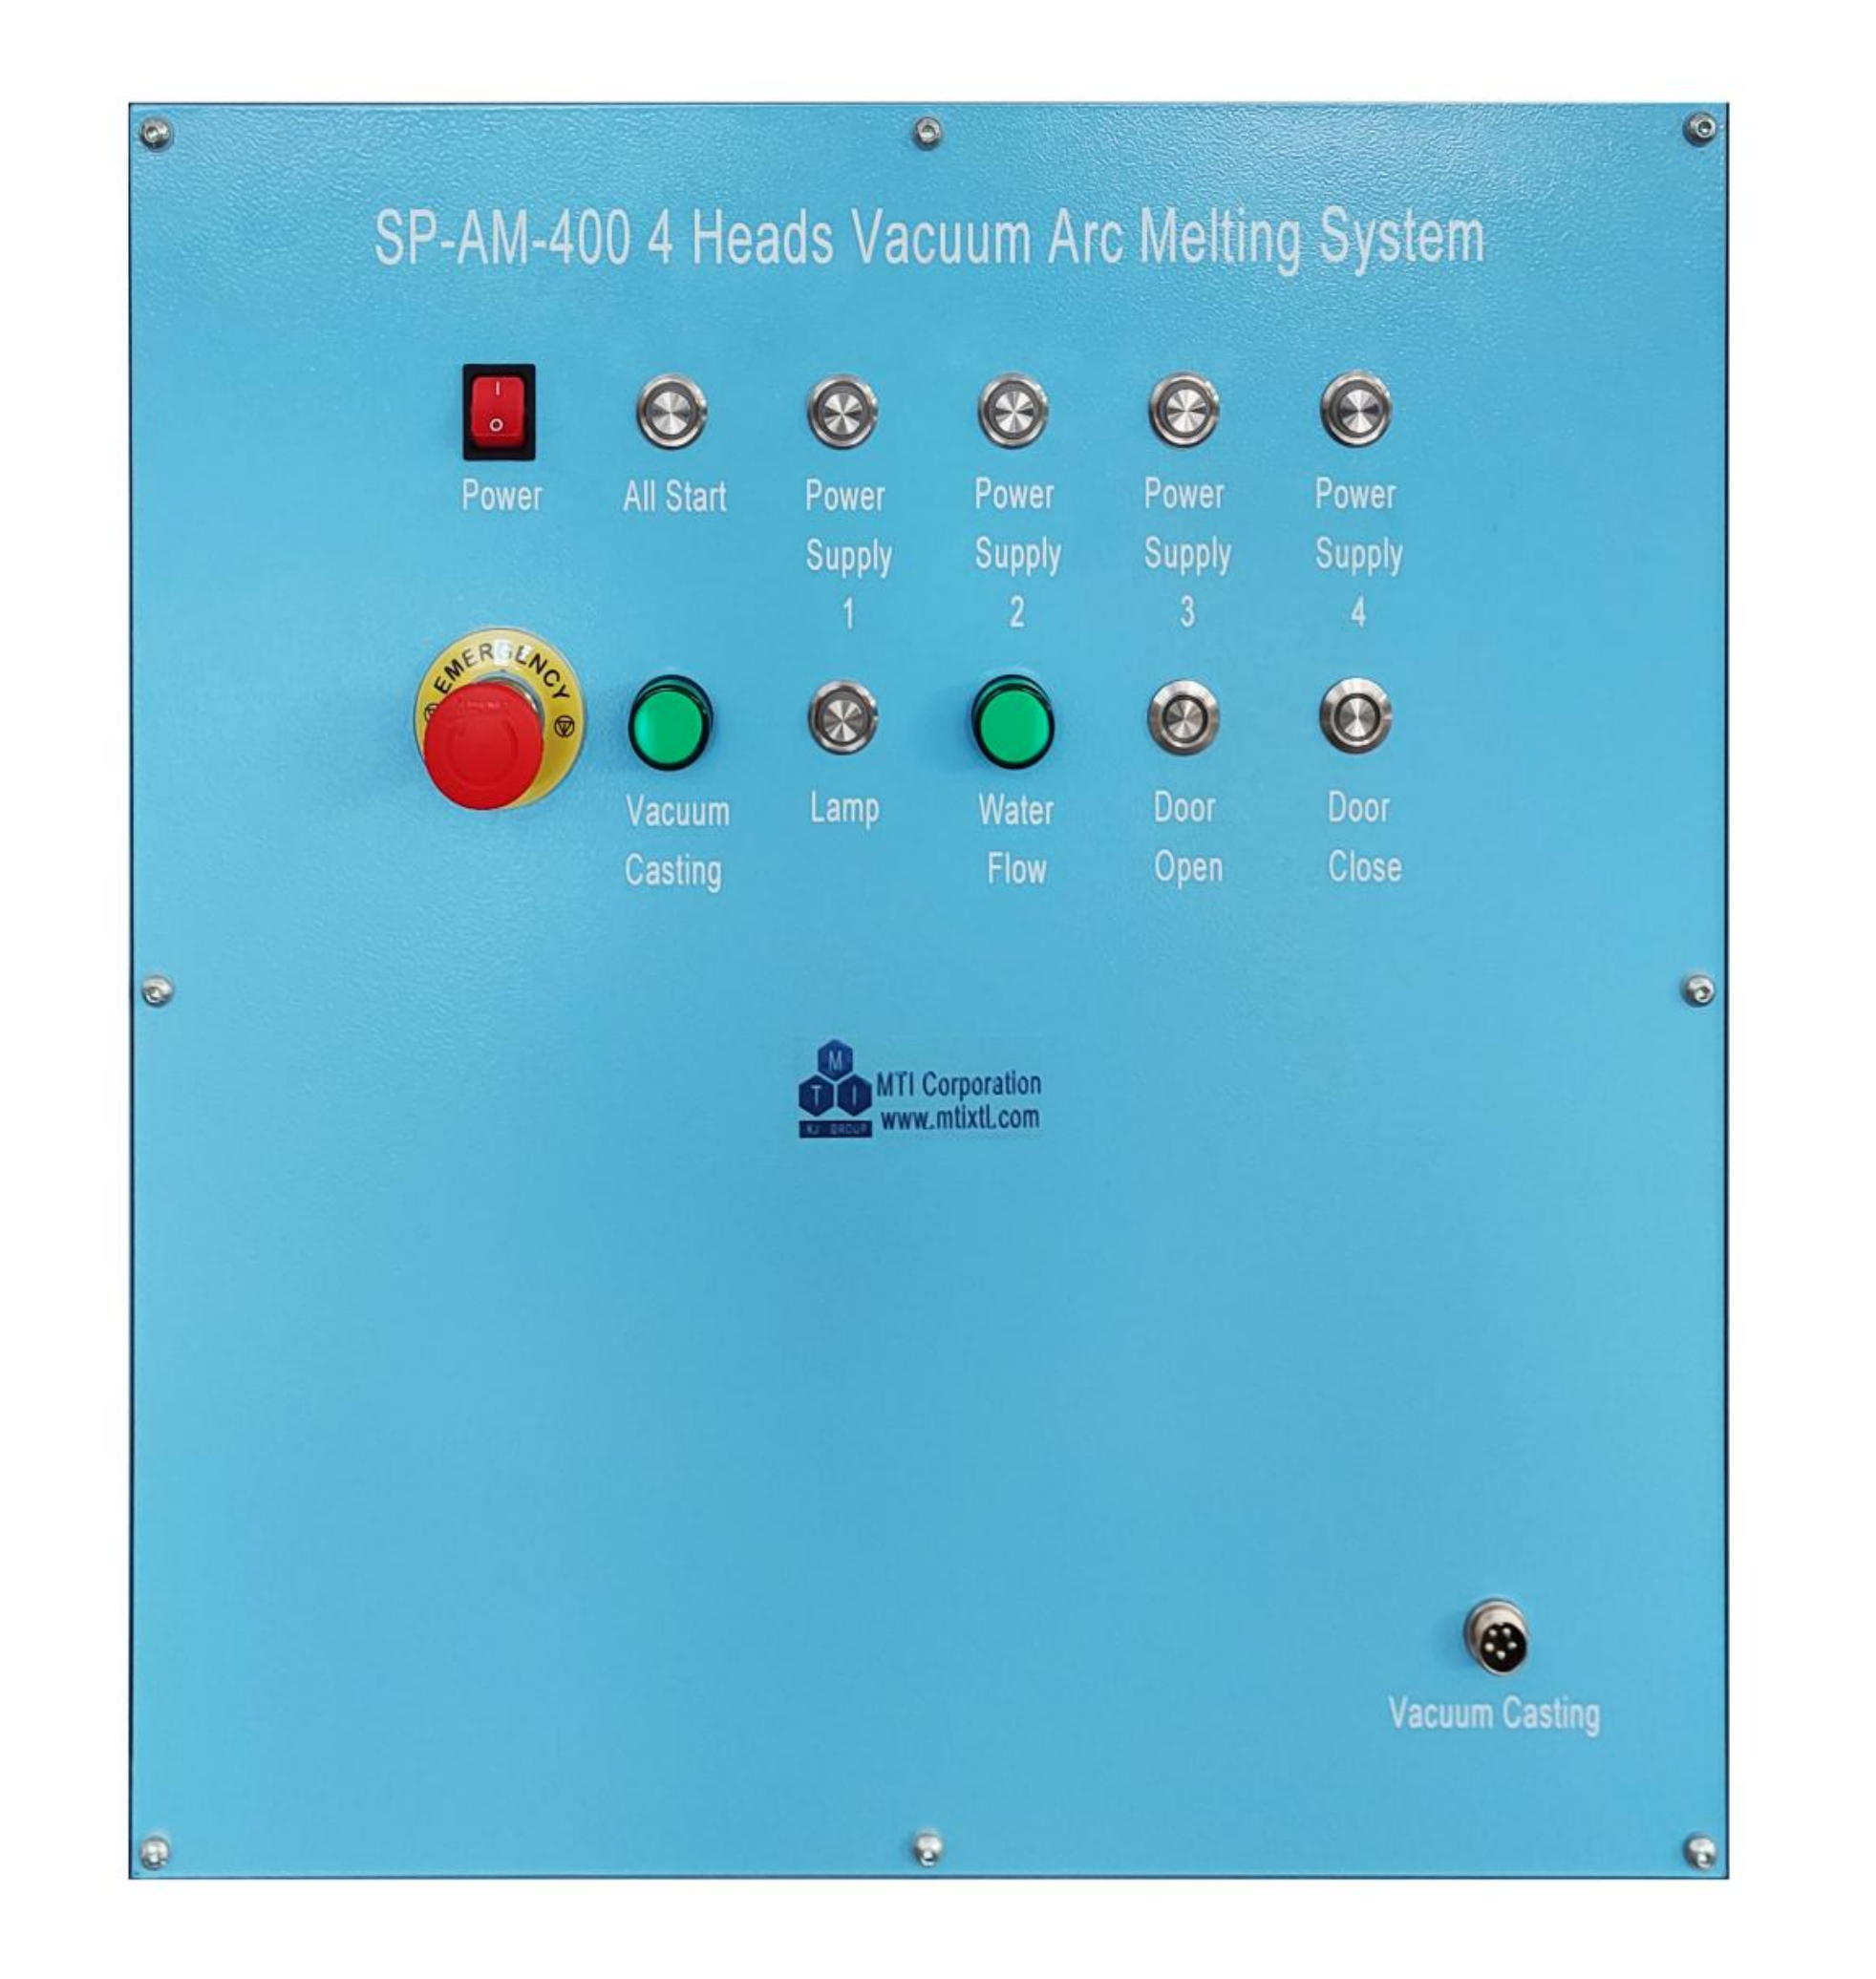
(2) The melting system control panel is shown in the figure below.

(3) Turn on the Lab Arc Melt Furnace: Turn the power switch "Power" on the panel to the "I" position to power on the system. The chiller indicator light will light up.
(4) Unscrew the three upper cover locking knobs. After confirming that there is no interference or obstruction at the position of the vacuum chamber upper cover, press and hold the "Door Open" button to open the vacuum chamber upper cover. After reaching the appropriate upper cover opening position, release the "Door Open" button.
(5) After placing the sample to be melted in the appropriate position of the melting crucible, adjust the angle and up and down stroke of the tungsten electrode rod so that the front end of the tungsten needle is 2~3mm away from the surface of the sample to be melted.
(6) Press and hold the "Door Close" button to close the vacuum chamber upper cover.
(7) Press the "Lamp" button to turn on the light inside the vacuum chamber, open the observation window baffle, and confirm that you can clearly see the internal conditions of the tungsten electrode, crucible and other accessories inside the vacuum chamber. (8) Open the high vacuum manual baffle valve, turn on the mechanical vacuum pump, and repeat the process of vacuuming (to -0.1MPa) and then filling with argon (recommended to -0.05MPa) 4-6 times to complete the vacuum chamber purge. Note: The upper cover handle needs to be tightened again during the vacuuming process. (9) Turn on the welding machine power supply and adjust the required welding machine current as needed (when using for the first time, if four tungsten electrodes are used at the same time, it is recommended that each welding machine be directly connected to a corresponding tungsten electrode. The current of each welding machine is recommended to be less than 100A. The subsequent current value can be adjusted according to customer needs). (10) Press the required arc power switch "Power Supply 1/2/3/4" in sequence (press the corresponding switch buttons according to the ones you need to turn on), and then press the main arc switch "All Start" to start the arc of the tungsten electrodes you need to set and start melting.
(11) If the suction casting function is required, you need to perform the following additional steps: After the sample is completely melted through, step on the suction casting foot switch to complete the suction casting function.
(12) After using the Lab Arc Melt Furnace, you need to turn off the main arc switch and the arc power switch of each station in sequence, adjust the welding machine current to the initial current (minimum current), turn off the mechanical vacuum pump, and turn off the welding machine after the welding machine has completed heat dissipation. Then close the argon pressure reducing valve and the argon gas bottle. After the sample has completely cooled, open the vent needle valve to break the vacuum. Open the vacuum chamber cover, adjust the arc-starting electrode rod height and angle, remove the sample, close the vacuum chamber cover, and check that the vent needle valve and flapper valve are closed. Turn off the power to the Lab Arc Melt Furnace and the water chiller.
Our Lab Arc Melt Furnace is manufactured using high-quality materials and to stringent manufacturing standards. To ensure accuracy, we perform multiple tests before shipment. We have an excellent after-sales team and professional technical support. If you have any questions, please feel free to contact us!
